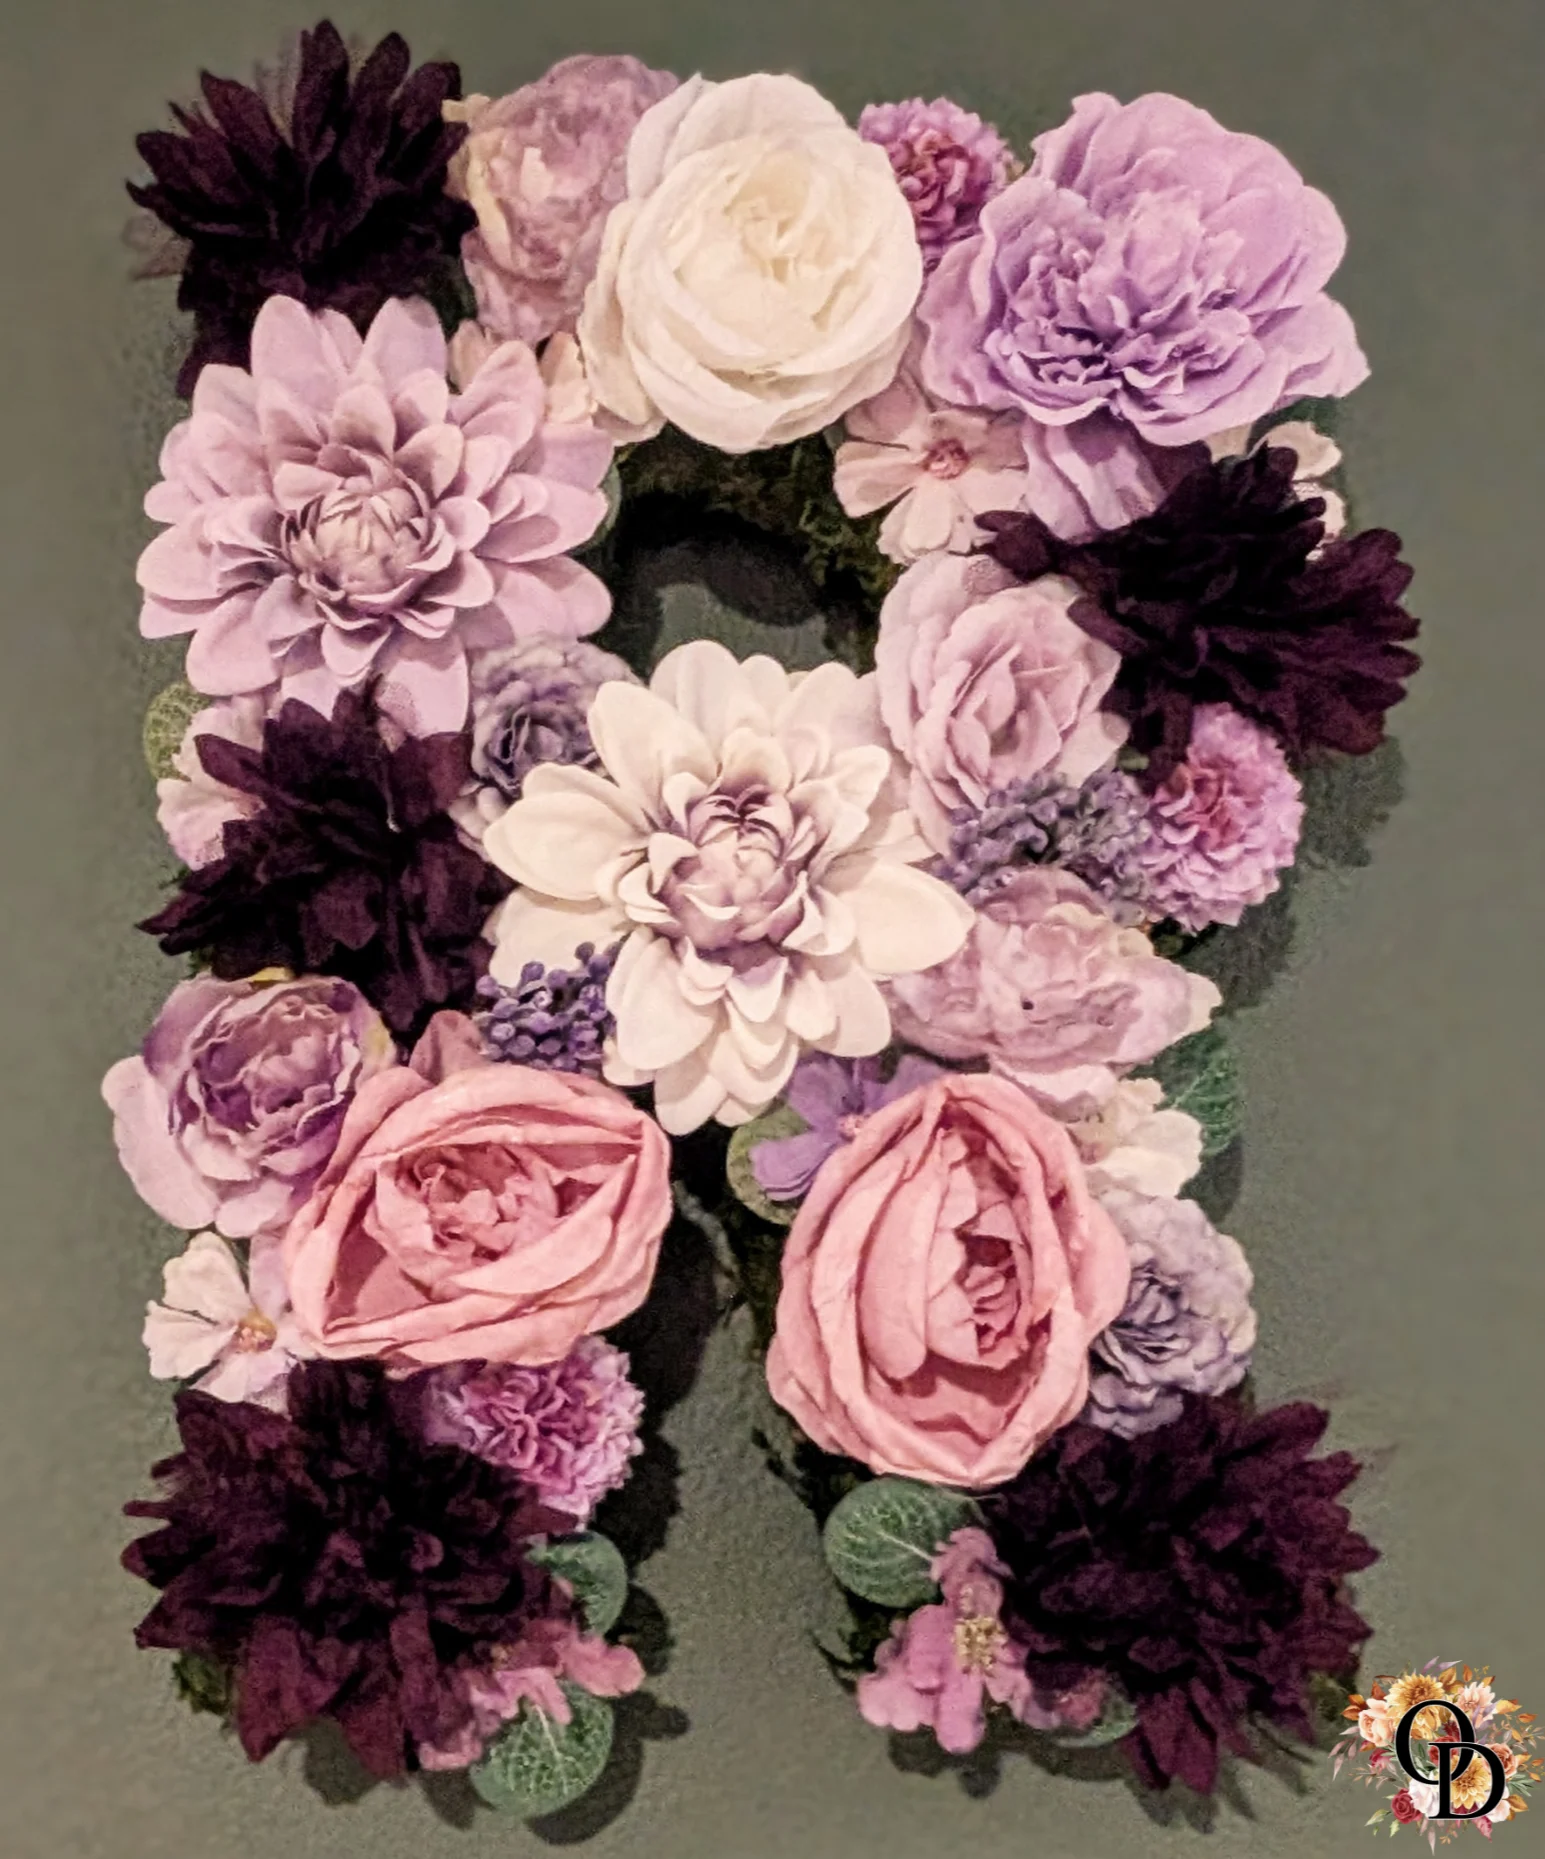
Adding personalized decor is a great way to make your home feel warm and inviting. This DIY decorative floral letter wall art is an easy, budget-friendly project that brings a touch of elegance to your space.
We chose the letter “R” to represent our family name, but you can customize this project with any letter that fits your home. Using a wooden letter, faux flowers, hot glue, and floral foam, this project is perfect for anyone looking to add a charming, handmade piece to their home decor.
Materials You’ll Need:
– White Wooden Letter (Shop here at Hobby Lobby)
– Faux Flowers: (Shop here on Amazon)
– Floral Foam: (Shop here on Amazon)
– Adhesive Backed Moss (Shop here at Hobby Lobby)
– Sharpie Marker
– Hot Glue Gun & Glue Sticks: (Shop here on Amazon)
– Styrofoam Cutter (Shop here on Amazon)
– Command Strips or Hanging Hardware (Shop here on Amazon)

Step-by-Step Instructions

Step 1: Prepare Your Wooden Letter
If using floral foam, the finish of the wooden letter doesn’t matter since the foam will cover it.
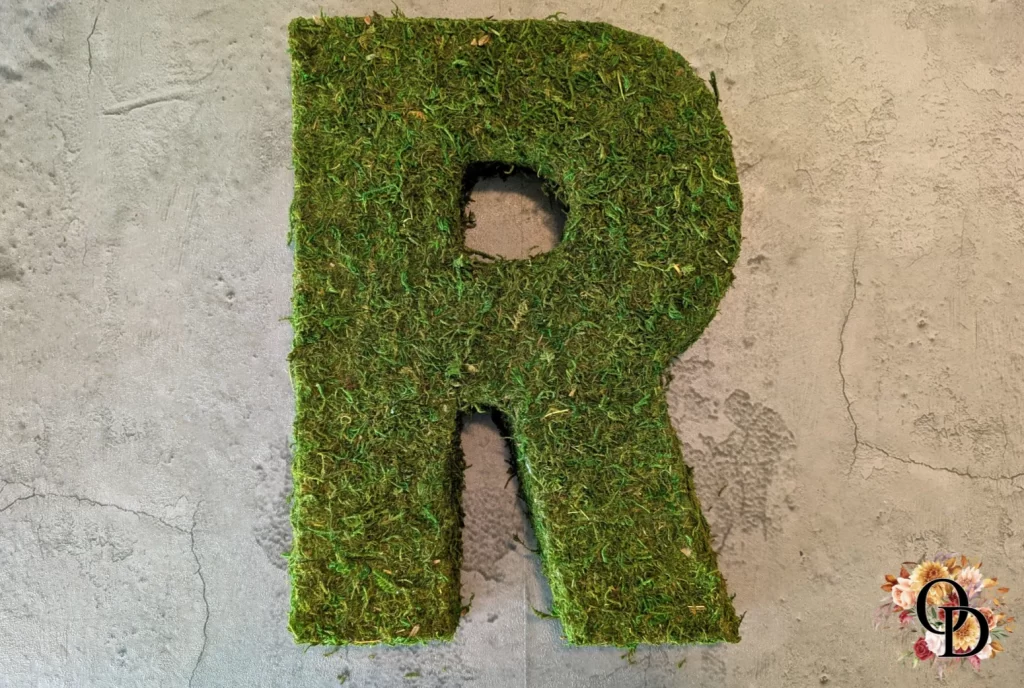
- Since I am using styrofoam I will be covering the styrofoam in adhesive backed moss before attaching the flowers.
If not using floral foam, consider painting the letter first to match your color scheme—this helps hide any gaps between flowers.
Step 2: Cut & Attach the Floral Foam
(Optional but Recommended)
You have two ways to attach the flowers:
With Styrofoam or Floral Foam (Recommended for Fullness & Flexibility)
Trace the letter on the foam using a sharpie marker.
- Cut a thin layer of foam using a knife or styrofoam cutter to fit the letter.
- Glue it down securely using a hot glue gun.
Without Floral Foam (Flat & Minimalist Look)
If using fabric-backed flowers, you can skip the foam and glue flowers directly to the letter for a sleek, flush finish.

Step 3: Cover with Moss (optional)
If you want added texture, cover the floral foam with adhesive-backed moss.
- Press the moss firmly onto the foam to ensure it sticks, use a box cutter knife to remove the access.
- If you prefer a cleaner look, you can paint the foam or leave it as is.

Step 4: Arrange the Flowers
The flowers we are using do not have stems, but if yours do, trim them down to about ½ inch.
- Arrange the flowers on the letter before gluing to find a layout you love.
Mix different sizes and colors for a balanced, natural look.

Step 5: Attach the Flowers
If using floral foam, gently press the flower stems into the foam, securing with hot glue if needed.
If not using floral foam, glue each flower directly onto the wooden letter.

Step 6: Fill in Any Gaps
Add smaller flowers or greenery to cover any empty spaces.
Ensure a full, balanced look.

Step 7: Add Hanging Hardware & Mount
Use Command Strips for a damage-free mounting option.
For a permanent mount, attach hanging hardware or a sawtooth hanger to the back.
Tips & Tricks
Try different flower placements before gluing. It’s easier to adjust before making it permanent!
Mix in greenery for added texture and depth.
Layer flowers for a 3D effect. Place some flat and others slightly raised to create dimension.
If using dark-colored flowers, consider painting the letter to match for a more seamless look.
Why We Love This DIY Decorative Floral Letter Wall Art:
Customizable for Any Space – Whether you want a soft, romantic look or a bold pop of color, you can choose flowers that match your aesthetic.
Affordable Yet High-End Look – This project mimics expensive boutique decor pieces at a fraction of the price.
Beginner-Friendly – No advanced crafting skills needed—just some glue, flowers, and creativity!
Perfect for Gifting – A floral letter makes a thoughtful, handmade gift for baby showers, weddings, or housewarmings.
Versatile & Timeless – Works as an entryway accent, nursery decor, or part of a statement gallery wall.
The DIY Decorative Floral Letter Wall Art is a fantastic way to add a personal and stylish touch to your home. Whether displayed in an entryway to create a welcoming first impression or used as a statement piece in a nursery, bedroom, or gallery wall, this project brings charm and personality to any space. Its versatility allows you to customize colors and floral arrangements to match any decor, making it an effortless way to refresh your home with a unique, handcrafted accent.
We hope you feel inspired to create your own DIY Decorative Floral Letter Wall Art! If you give it a try, we’d love to see your creations. Share your photos in the comments! Looking for more DIY inspiration? Be sure to explore our other home decor projects for even more creative ideas!


